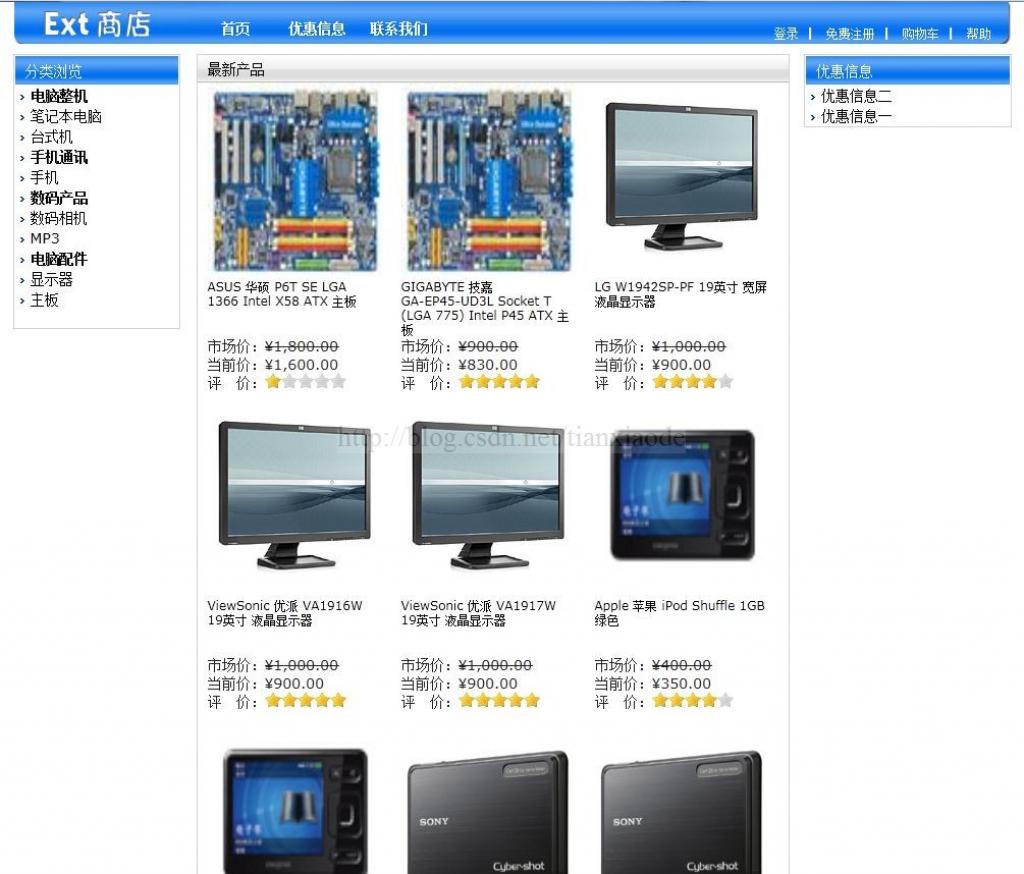
首页主要包括两部分,主体部分显示15个最新的的商品,右边则显示10条最新的优惠信息。主体部分可以直接使用传入的数据生成,也可以通过分类列表的方法生成,看个人喜好。而优惠信息则使用分类的方法生成。
在完成首页前,需要做点准备功夫,因为需要显示评价,所以首先到地址“http://plugins.jquery.com/project/Star_Rating_widget
”下载一个名称为“jQuery
UI
Stars”的插件。插件下载后,将jquery.ui.stars.css文件添加到Content文件夹,jquery.ui.stars.min.js文件添加到Scripts文件夹,而jquery.ui.stars.gif则放到images文件夹。最后还需要修改一下jquery.ui.stars.css文件中背景图片的路径。
在母版页_Layout.cshtml的head中增加以下文件的引用:
| 1 |
<
link
href
=
"
@Url.Content(
"
~
/
Content
/
jquery
.
ui
.
stars
.
css
"
)
"
rel
=
"
stylesheet
"
type
=
"
text/css
"
/
>
|
| 2 |
<
script
src
=
"
@Url.Content(
"
~
/
Scripts
/
jquery
-
ui
.
min
.
js
"
)
"
type
=
"
text/javascript
"
>
<
/
script
>
|
| 3 |
<
script
src
=
"
@Url.Content(
"
~
/
Scripts
/
jquery
.
ui
.
stars
.
min
.
js
"
)
"
type
=
"
text/javascript
"
>
<
/
script
>
|
| 4 |
|
现在要完成首页的整体布局,打开Index.cshtml,讲ViewBag.Title修改为“首页——Ext商店”,然后加入以下代码:
| 1 |
<
div
id
=
"
contentMain
"
>
|
| 2 |
<
span
class
=
"
header
"
>
最新产品
<
/
span
>
|
| 3 |
@
{
Html
.
RenderAction
(
"
Homepage
"
,
"
Product
"
)
;
}
|
| 4 |
<
/
div
>
|
| 5 |
<
div
id
=
"
contentRight
"
>
|
| 6 |
<
span
class
=
"
header
"
>
优惠信息
<
/
span
>
|
| 7 |
@
{
Html
.
RenderAction
(
"
RightList
"
,
"
News
"
)
;
}
|
| 8 |
<
/
div
>
|
| 9 |
|
代码中,最新产品和优惠信息的数据都将从partial视图获取。下面在Site.css中加入以下css:
| 1 |
#contentMain
{
float
:
left
;
width
:
580px
;
display
:
block
;
border-left
:
1px
solid
#d3d3d3
;
border-right
:
1px
solid
#d3d3d3
;
border-bottom
:
1px
solid
#d3d3d3
;
}
|
| 2 |
#contentMain
.header
{
width
:
570px
;
height
:
28px
;
background
:
url(/images/bk.gif)
repeat-x
;
line-height
:
28px
;
display
:
block
;
color
:
#000
;
font-size
:
14px
;
margin
:
0px
;
padding-left
:
10px
;
}
|
| 3 |
#contentMain
ul
{
float
:
left
;
width
:
180px
;
display
:
block
;
padding
:
0
0
10px
10px
;
}
|
| 4 |
#contentMain
li
{
list-style-type
:
none
;
}
|
| 5 |
#contentMain
.title
{
height
:
56px
;
line-height
:
14px
;
width
:
170px
;
display
:
block
;
font-size
:
12px
;
}
|
| 6 |
#contentMain
.rating
-title
{
float
:
left
;
}
|
| 7 |
#contentMain
.rating
{
float
:
left
;
width
:
90px
;
}
|
| 8 |
#contentMain
img
{
border
:
0px
;
width
:
170px
;
height
:
190px
;
}
|
| 9 |
#contentMain
a
{
text-decoration
:
none
;
color
:
#000
;
}
|
| 10 |
#contentMain
a:hover
{
text-decoration
:
underline
;
}
|
| 11 |
#contentMain
a:visited
{
text-decoration
:
none
;
color
:
#000
;
}
|
| 12 |
#contentRight
{
float
:
right
;
width
:
200px
;
display
:
block
;
border
:
1px
solid
#d3d3d3
;
padding
:
1px
;
}
|
| 13 |
#contentRight
.header
{
background
:
url(/images/leftHeader.jpg)
repeat-x
;
height
:
28px
;
line-height
:
28px
;
width
:
190px
;
display
:
block
;
color
:
#fff
;
font-size
:
14px
;
margin
:
0px
;
}
|
| 14 |
#contentRight
span
{
width
:
180px
;
display
:
block
;
height
:
20px
;
line-height
:
20px
;
background
:
transparent
url(/images/point02.jpg)
no-repeat
scroll
0
10px
;
padding-left
:
10px
;
margin-left
:
5px
;
}
|
| 15 |
#contentRight
a
{
color
:
#000
;
}
|
| 16 |
#contentRight
a:hover
{
text-decoration
:
underline
;
}
|
| 17 |
#contentRight
a:visited
{
color
:
#000
;
}
|
| 18 |
|
现在要完成最新产品的显示。在Controllers文件夹添加一个“ProductController”的控制器,首先加入对“Extshop.Models”的引用,然后添加以下代码:
| 1 |
[
ChildActionOnly
]
|
| 2 |
public
ActionResult
Homepage
(
)
|
| 3 |
{
|
| 4 |
var
q
=
dc
.
T_Products
.
OrderByDescending
(
m
=
>
m
.
CreateTime
)
.
Take
(
15
)
;
|
| 5 |
return
PartialView
(
q
)
;
|
| 6 |
}
|
| 7 |
|
代码只是很简单的从数据库取出15条记录,然后返回Partial视图。在“Homepage”上单击鼠标右键,然后创建一个Partial视图,在视图中添加以下代码:
| 1 |
@
model
IEnumerable
<
Extshop
.
Models
.
T_Products
>
|
| 2 |
@
{
|
| 3 |
foreach
(
var
c
in
Model
)
|
| 4 |
{
|
| 5 |
<
ul
>
|
| 6 |
<
li
>
<
a
href
=
'
@
Url
.
Action
(
"
Details
"
,
"
Product
"
,
new
{
id
=
c
.
ProductID
}
)
'
>
<
img
src
=
'
/
Images
/
products
/
@
c
.
SamllImageUrl
'
alt
=
"
@c.Title
"
/
>
<
/
a
>
<
/
li
>
|
| 7 |
<
li
class
=
'
title
'
>
<
a
href
=
'
@
Url
.
Action
(
"
Details
"
,
"
Product
"
,
new
{
id
=
c
.
ProductID
}
)
'
>
@
c
.
Title
<
/
a
>
<
/
li
>
|
| 8 |
<
li
>
市场价:
<
del
>
@
c
.
MarketPrice
.
ToString
(
"
C
"
)
<
/
del
>
<
/
li
>
|
| 9 |
<
li
>
当前价:
@
c
.
UnitPrice
.
ToString
(
"
C
"
)
<
/
li
>
|
| 10 |
<
li
>
<
span
class
=
"
rating-title
"
>
评 价:
<
/
span
>
|
| 11 |
<
div
class
=
'
rating
'
id
=
"
@c.ProductID.ToString(
"
rat
-
0
"
)
"
>
|
| 12 |
<
input
name
=
"
@c.ProductID.ToString(
"
Star0
"
)
"
type
=
"
radio
"
class
=
"
star
"
disabled
=
"
disabled
"
value
=
"
1
"
@
(
c
.
TotalRating
=
=
1
?
"
checked='checked'
"
:
"
"
)
/
>
|
| 13 |
<
input
name
=
"
@c.ProductID.ToString(
"
Star0
"
)
"
type
=
"
radio
"
class
=
"
star
"
disabled
=
"
disabled
"
value
=
"
2
"
@
(
c
.
TotalRating
=
=
2
?
"
checked='checked'
"
:
"
"
)
/
>
|
| 14 |
<
input
name
=
"
@c.ProductID.ToString(
"
Star0
"
)
"
type
=
"
radio
"
class
=
"
star
"
disabled
=
"
disabled
"
value
=
"
3
"
@
(
c
.
TotalRating
=
=
3
?
"
checked='checked'
"
:
"
"
)
/
>
|
| 15 |
<
input
name
=
"
@c.ProductID.ToString(
"
Star0
"
)
"
type
=
"
radio
"
class
=
"
star
"
disabled
=
"
disabled
"
value
=
"
4
"
@
(
c
.
TotalRating
=
=
4
?
"
checked='checked'
"
:
"
"
)
/
>
|
| 16 |
<
input
name
=
"
@c.ProductID.ToString(
"
Star0
"
)
"
type
=
"
radio
"
class
=
"
star
"
disabled
=
"
disabled
"
value
=
"
5
"
@
(
c
.
TotalRating
=
=
5
?
"
checked='checked'
"
:
"
"
)
/
>
|
| 17 |
<
/
div
>
|
| 18 |
<
/
li
>
|
| 19 |
<
/
ul
>
|
| 20 |
}
|
| 21 |
}
|
| 22 |
|
代码中12到16行的作用是生成评价图,在这里需要给每一组input不同的“name”属性以区别分组,因为产品编号是唯一的,所以使用它作为名称的一部分是最好的。
要使评价图显示,还需要在首页中添加以下代码:
| 1 |
<
script
type
=
"
text/javascript
"
>
|
| 2 |
jQuery
(
function
(
)
{
|
| 3 |
$
(
"
div
.rating
"
)
.
stars
(
)
;
|
| 4 |
}
)
;
|
| 5 |
<
/
script
>
|
该段代码的作用是在页面显示加载完毕后,通过div元素的class属性获取所有生成评价图的对象,对它们进行初始化。
最后需要完成的是右边优惠信息的显示。在Controllers文件夹下添加一个“NewsController”控制器并添加需要的引用,然后添加以下代码:
| 1 |
[
ChildActionOnly
]
|
| 2 |
public
ActionResult
RightList
(
)
|
| 3 |
{
|
| 4 |
var
q
=
dc
.
T_News
.
OrderByDescending
(
m
=
>
m
.
CreateTime
)
.
Take
(
10
)
;
|
| 5 |
return
PartialView
(
q
)
;
|
| 6 |
}
|
| 7 |
|
代码也很简单,获取10条最新优惠信息后返回Partial视图。在“RightList”上单击鼠标右键,然后创建一个Partial视图,在视图中添加以下代码:
| 1 |
@
model
IEnumerable
<
Extshop
.
Models
.
T_News
>
|
| 2 |
|
| 3 |
@
{
|
| 4 |
foreach
(
var
c
in
Model
)
|
| 5 |
{
|
| 6 |
<
span
>
<
a
href
=
'
@
Url
.
Action
(
"
Details
"
,
"
News
"
,
new
{
id
=
c
.
NewsID
}
)
'
>
@
c
.
Title
<
/
a
>
<
/
span
>
|
| 7 |
}
|
| 8 |
}
|
| 9 |
|
| 10 |
|
代码也是相当的简单,逐条显示优惠信息的标题就行了。
这样,首页的功能就已经完成了,在浏览器打开,将看到如图1所示的结果。
图1
分享到:


相关推荐
Asp.net MVC 3实例学习之ExtShop最终源代码
Asp.net MVC 3实例学习之ExtShop(四)的源代码
ASP.NET MVC作为微软官方的.NET平台下MVC解决方案,自诞生起就吸引了众多.NET平台开发人员的眼球。ASP.NET MVC从一开始的设计思路就与Struts不同,它的映射是利用路由配置而非xml,从而大大降低了开发复杂度,并且比...
基于ASP.NET MVC框架的学习项目,包含MVC的框架的设计思路,通俗易懂学习MVC框架,需要VS2010及以上版本打开,初学者可以快速理解MVC的构思以及开发。
vs2010 配sql2008 asp.Net mvc4 开发的实例
Asp.Net MVC案例教程 Asp.Net MVC案例教程 Asp.Net MVC案例教程 Asp.Net MVC案例教程 Asp.Net MVC案例教程 Asp.Net MVC案例教程
ASP.net MVC3 中文教程ASP.net MVC3 中文教程ASP.net MVC3 中文教程ASP.net MVC3 中文教程
asp.net MVC3实例开发教程,是基于ASP.NET MVC3+ADO.NET4+EF4.1+Jquery+插件等技术下的CRM企业客户管理系统,asp.net MVC3实例开发教程由北风网提供,asp.net MVC3实例开发教程包括:营销管理、客户管理、服务管理、...
精通asp.net mvc 4 实例源码,第个章节实例,包含SportsStore.
通过本书的学习,读者可以全面掌握ASP.NET MVC的开发,并从代码中获取软件开发与架构设计的经验与灵感。本书具有很大的参考价值,既适合ASP.NET MVC开发初学者阅读,也适合有一定基础的ASP.NET MVC开发人员进行技术...
Asp.Net mvc 3,Asp.Net mvc 3,Asp.Net mvc 3,Asp.Net mvc 3,Asp.Net mvc 3,Asp.Net mvc 3,Asp.Net mvc 3,Asp.Net mvc 3,Asp.Net mvc 3
dwz框架 asp.net mvc3;dwz框架 asp.net mvc3;dwz框架 asp.net mvc3
asp.net MVC4 CMS 完整的源代码,学习和提高asp.net mvc4可以参考一下。
asp.net mvc架构网站实例.
微软官方Asp.net Mvc源代码,可以深入理解mvc的原理,内部实现
ASP.NET MVC 5 - 开始MVC 5之旅 2. ASP.NET MVC 5 - 控制器 3. ASP.NET MVC 5 - 视图 4. ASP.NET MVC 5 - 将数据从控制器传递给视图 5. ASP.NET MVC 5 - 添加一个模型 6. ASP.NET MVC 5 - 创建连接字符串并使用SQL ...
ASP.NET MVC3书店实例 叫你mvc3快速入门
AngularJS 开发 ASP.NET MVC.
ASP.NET MVC 项目集合